Showing posts with label ganache. Show all posts

Tuesday, October 21, 2014

Magic Cookies and Mustaches–Not what you think :)

A friend asked if I’d make cookies for her nephew who was having a magic themed birthday.  The only request was they not be babyish.  He was six not a baby!

I scoured the internet for magic themed ideas but they were either very babyish or too scary, so I incorporated a little bit of both!

magiccookieset

I had fun with stamping, painting and stenciling!

Next up was for our babysitter and all around awesome person, Alyssa.  She asked if I’d do her dad’s 60th birthday cake and cookies.  Chevrons and mustaches.  Cute!

They sent me the invite and I tried to do them justice.

IMG_4235

First the cookies:

mustachecookies

Next the cake:

mustachecake

Creating this cake became a comedy of errors.  We had our house up for sale and hadn’t had a showing in two weeks.  So, of course, we got one the day I was decorating the cake.  I had just finished ganache-ing this chocolate cherry cake when the text message came in giving me an hour and fifteen to get the house show ready.  So into the fridge it went.  I got the house ready, took the dogs for a walk, came back and pulled the cake back out to ice.  Then of course the door bell rang and the showing was rescheduled but they neglected to let me know.  Cake back into the fridge.  After they left I tried again and another text for another showing came in.  Cake back into the fridge.  The dogs and I are back out of the house, I picked up the girls at school and we went to get some ice cream as a treat.  Another text comes in from the showing people; they need to reschedule until tomorrow.  This was 45 minutes into the showing…are you kidding me?????  In the end I was up late finishing this cake because we now had showings for Saturday and the cake was to be picked up early afternoon.  I had originally wanted to put chevrons but didn’t like the way they looked, so I cut out some mini mustaches and added some dots. I used tappits for the letters. It turned out pretty cute but I wasn’t loving it until I got  this awesome email.

“I just wanted to say thank you for the amazing cake and cookies.  That had to be THE BEST CAKE we have ever had...and it was really beautiful!  The cookies were a big hit too.”

Thank for looking!

Monday, September 15, 2014

Guitar Cake–How I did it!

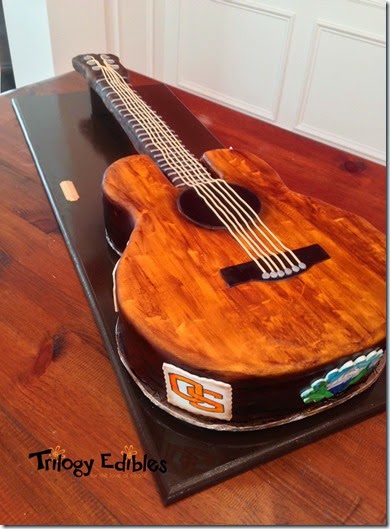
guitarcake1

This past weekend was our friends, Gary and Olivia’s wedding.  They asked if I would make some cookies and a cake for the rehearsal dinner and of course I said yes, it would be my honour.  Gary didn’t want anything grooms-y but Olivia had a different idea.  She emailed me without Gary knowing and asked it I would make a guitar cake.  I’ve never done a sculpted cake before; so the challenge was thrown.  I went to Google and searched guitar cakes and most of them were great, however, very few were lifelike or life size.  Then whilst on Facebook one day, I saw a post by Jessicakesblog.com about a blog she did on how she made a stand up electric guitar.  I didn’t follow her directions completely, since I was going acoustic, but it did use a lot of her tips and loved that she went realistic.

This is the first sculpted cake I’ve ever made but to be honest, it was pretty simple in the carving department.  It was all the finicky details and making the fondant cover the cake right that made my heart beat a little faster.
guitar

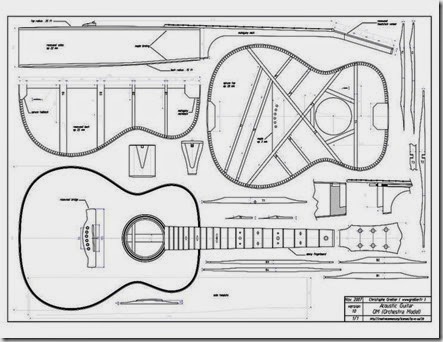
So I started with getting an acoustic guitar template off the internet.  I then used my KopyKake lying on it’s side and projected the template onto the MDF board against the wall.  I played with it a lot to get it to look life size.  Then I just outlined the guitar. 

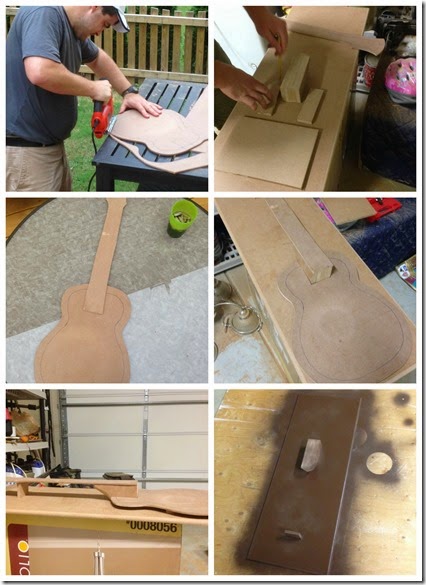
This is where my hubby stepped in with his mad carpentry skills.  He cut out the guitar body and neck separately.  It couldn’t be one piece since it wouldn’t fit in the fridge, so I made it two pieces.  Then he cut out the thicker board for the base, pieced together the angled piece that connects the neck to the body and then some final pieces to help elevate the guitar so it looks like it’s floating.  He edged everything to make it look polished and then spray painted it all dark brown.
structure

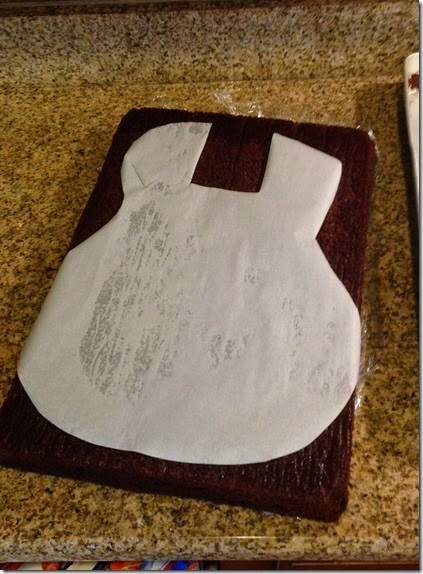
Back in the kitchen, I baked to half sheet cakes and popped them into the freezer.  I covered both the body and neck pieces with aluminum foil.  As per Jessica’s advice, I used two sided take to put it in place. I then took the body board and traced it out on parchment and cut it out a 1/2 inch smaller.  Then I placed it on to the partially frozen cakes and cut them out.
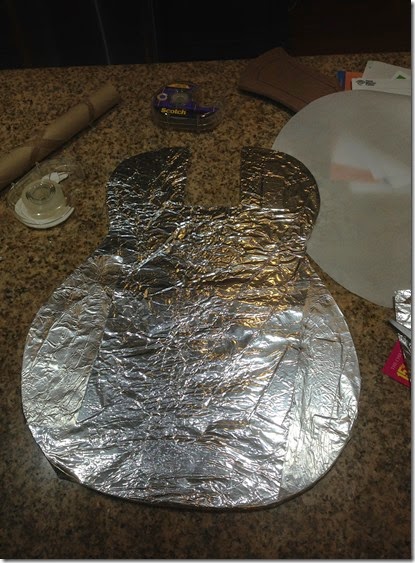
photo 1

IMG_3862

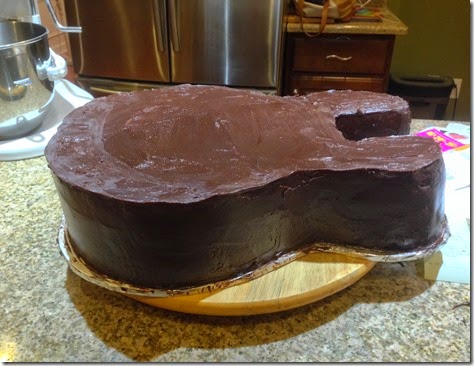
The one thing Jessica emphatically stated was that chocolate ganache was the way to go, so that’s where I went.  Five pounds of it actually ;)  Once all was ganached, into the fridge overnight.  It weighed a ton, ok may 10lbs with the board, cake and ganache.
IMG_3873

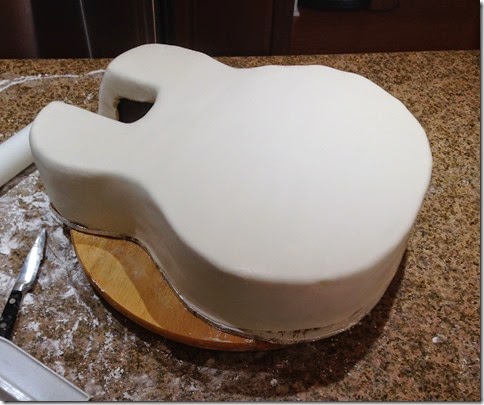
Next up was to cover in fondant. After procrasti-cleaning the downstairs, I rolled out a huge piece of white fondant.  Then I prayed to the fondant gods and onto the cake it went.  To my absolute amazement, it went on beautifully.  Yay me :)  I put it back into the fridge so it would completely firm up.
IMG_3893

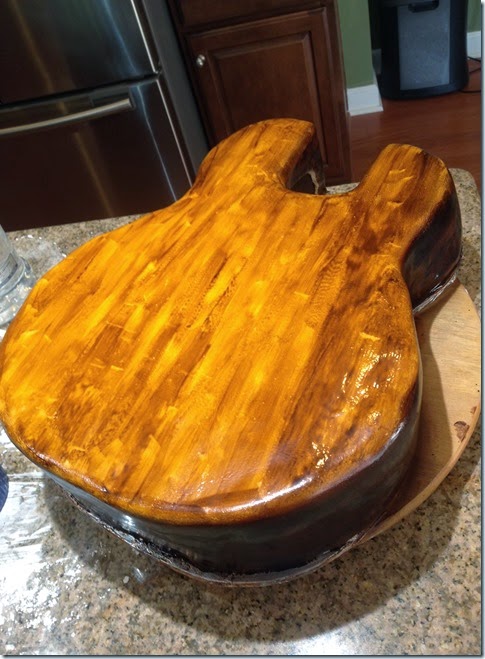
I had planned to just airbrush the colour on but instead decided to paint the wood grain onto the top of the guitar body.  I used Americolor chocolate brown and Americolor Yellow with vodka.  I had to play with how much of each before I got the right colour.  I used an extra piece of rolled out fondant and brushed each try until I got it right.  I also used a wide brush which I think really helped give it that wood grain look.
IMG_3896

When the top was painted I just used the chocolate brown with vodka and painted the sides.  It didn’t come out dark enough so I pulled out the airbrush and redid the sides with the Americolor airbrush brown.  It was starting to look like a guitar.

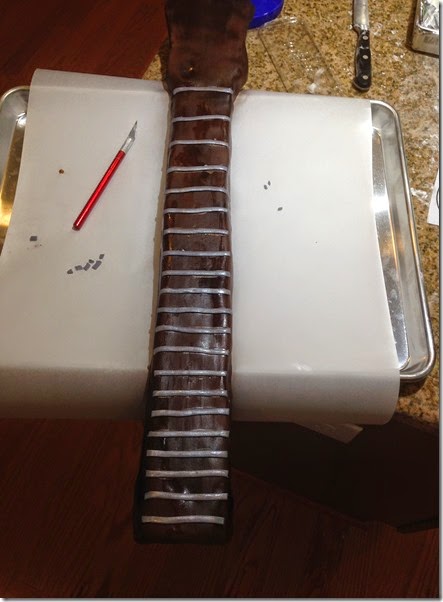
I then moved on to the neck of the guitar.  I didn’t want to use cake, so I made Rice Krispie Treats (RKT) and cut them into the shape of the neck.  I covered with chocolate ganached and then covered with dark brown fondant (which I coloured myself).  I also airbrushed it with the dark brown to match the guitar body.  Once finished I thought I should see if it all fit together.  Initially I didn’t think it did, but then I just pushed it a bit and it fit perfectly.
IMG_3899

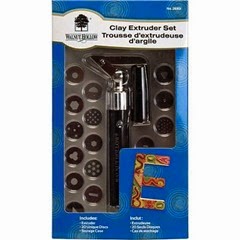
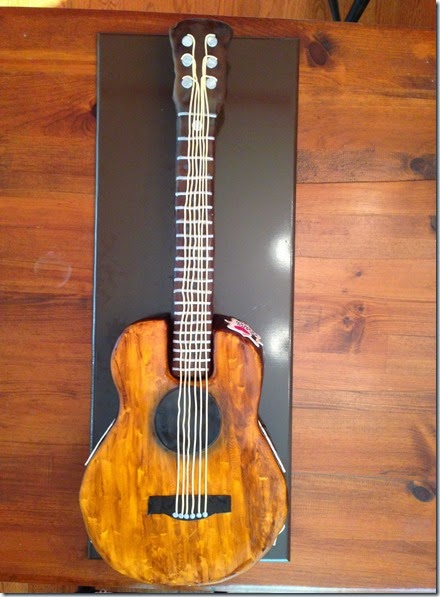
Now for the details.  I used the dark brown fondant and made the large circle and small piece where the strings attach and airbrushed them black.  All of the neck pieces are edible as well.  I used my new clay extruder to make all the note marks and the strings.  I love this new toy so much because I no longer have to hurt my hands to create strings or boarders anymore since it has a crank handle.  Genius. 
clayextruder

The note marks and string holders are grey fondant painted with silver luster dust and vodka, and the strings themselves are ivory coloured fondant.  I used spaghetti to attach the pieces to the neck head.  I also added “bumper stickers” of all the places Gary has lived as well as his love for the Oregan State Beavers.
IMG_3906

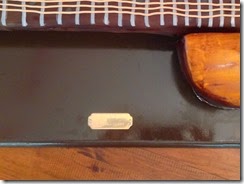
The last thing added was the small plaque we had engraved with Gary and Olivia’s names and wedding date.  I attached it to the board with fondant so they could pop it off and have it as a keep sake.
IMG_3919

So there you go.  That’s how I made it.

This is what it looked like to travel the hour and half away.
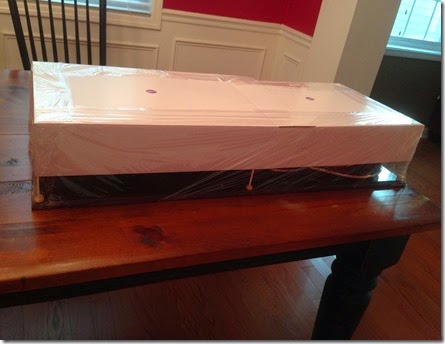
IMG_3922

And this is the guitar at the rehearsal dinner.
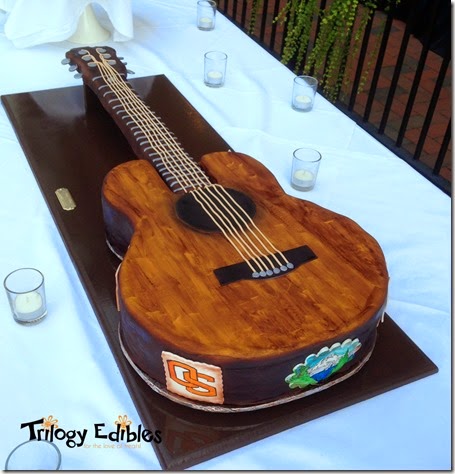
guitarcake

I had a ton of fun making this cake despite the stress of it being my first carved cake.  Everyone loved it and as you can tell by this next picture, it tasted pretty good too.  Even the RKT neck got eaten :)
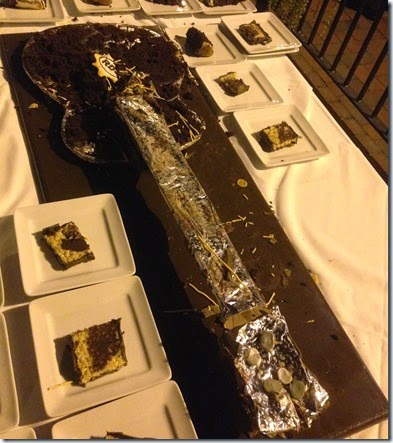
IMG_3933

On to the next cake…actually cookies :)

Thanks for looking!

Tuesday, May 28, 2013

My First Attempt at an Ice Cream Cake

icecream

I always like to challenge myself and this past weekend was no different. I’ve always wanted to try to make an ice cream cake but never got around to it and since it was Memorial Day weekend, I thought it was a perfect time to give it a go.

My husband smoked a pork shoulder for a big bbq feast on Sunday and I wanted to make a dessert that would match up with the tastiness!

icecreamcake

I made my new favourite chocolate cake from Barefoot Contessa on Saturday and then had to take a break.  Sadly my back has decided to give out on me again and so I can only work on stuff a little at a time.

Sunday we went strawberry picking. Ok, the girls picked and I watched.  But we scored quite a few!  I decided that our cake needed a strawberries and cream layer.

icecreamslice

Putting it together:

  1. First off, you need a spring form pan.  That’s a pan that you can take the sides off with a clip.
  2. Bake 3 thin layers of cake.  I weighed my batter and then divided into 10 oz each.
  3. I used Bryers Vanilla ice cream, take it out and left soften about 10 minutes.
  4. In the spring form pan place the first layer of cake down.
  5. Scoop ice cream onto cake layer and smooth out.
  6. Top with another cake layer and put into freezer to firm up.
  7. While the cake is freezing up, slice strawberries, whip cream and make some ganache.
  8. Remove cake from freezer and pour some ganache over cake.  Then cover with sliced strawberries and whipped cream and the final layer of cake.
  9. Put back into freezer until ready to serve.
  10. With the remaining ganache, whip up using a hand blender until fluffy.
  11. When ready to serve, remove cake from freezer and cover with the fluffy ganache.
  12. Slice and serve!
  13. Enjoy!

Now my biggest issue was covering the entire with icing.  Most store bought ice cream cakes use a full shortening icing that doesn’t freeze.  I CAN’T DO THAT, WON’T DO THAT.  So I only covered the top.  I liked the rustic look it had and without the icing, wasn’t that sweet, which I prefer!

icecreamslicecloseup

Was this good?  OMG yes!

Should you attempt?  Absolutely!

It’s a little time consuming but really, what cake isn’t?

thanks for looking!

Wednesday, May 1, 2013

Treat Day Wednesday - The Easy Peasy Cupcake

ganachedip3

Sometimes you want an easy peasy cupcake right?????  My kids and I have gotten on the icing free cupcake kick.  You get a nice treat without OD’ing on icing. But sometimes you want a little extra something something.  So I thought, “how about dipping them in chocolate ganache?” 

BRILLIANT, that’s what I say!  My kids would concur.

So make your favourite cupcake,  make ganache and then if you are feeling crazy you can decorate with royal icing.  I did, but only because I had some already bagged after teaching a friend how to decorate cookies.

ganachedip2

I also got a new cake plate, isn’t it pretty???? Love Homegoods!!!

Ganache:

  • 1/4 cup heavy whipping cream
  • 1 cup chocolate chips
  1. Bring cream to a boil. Careful, this happens a lot faster than you would think.  Keep an eye on it.
  2. Drop in chocolate and melt completely.  If too thick add a little cream at a time.
  3. It’ll be pretty runny but that’s what you want to dip the cupcakes into.  Just dip the tops, place on rack and let dry.
  4. Use royal icing to create designs.  I just made flowers.
  5. For the leftover ganache, place in fridge and when it’s completely set up.  Spoon into little balls and roll in powdered sugar.  Voila…chocolate truffles! The added bonus Smile

So simple and so tasty.  A true treat day treat!

Thanks for looking!

Tuesday, January 15, 2013

Gluten Free Vanilla Custard Bars

IMGP1378

I know what you are thinking.  Ugh! Gluten Free equals gritty texture right? Or it goes in the opposite and is very cakey with a gritty after bite.  Basically if you don’t have to put yourself in the world of gluten free, you don’t.

This isn’t my first foray into the gluten free world.  I made a cake for a friend many moons ago and last year I made my best friend sugar cookies for her birthday.  Both turned out pretty good, at least that’s what I was told but I still wasn’t happy.  This past weekend Rowan has a play date with two friends, sisters who were gluten free.  So I decided to have the girls decorate cookies, it’s kind of my standard play date activity for the first time visit (you know hop them up on sugar and send them home LOL).

gfcookieparty

I’ve also wanted to try the new Cup4Cup Gluten Free flour. As the name indicates, you just substitute this flour for whatever amount flour in any recipe.  Now save your pennies, it ain’t cheap.  It’s $19.95 for 3lbs and can only be found at Williams Sonoma, hence the price.  You can also buy in wholesale in 25lb bags but until you are sure you want to make a lot of gluten free cookies or desserts, I’d go with the small bag first.

The girls loved the cookies and made some pretty awesome cookies! 

But now what to do with the rest.  I know make a cookie bar!

IMGP1379

I was cleaning out the pantry and found my Birds Custard Powder and I knew right there what I was going to make.

As a Canadian a common holiday treat is the traditional Nanaimo Bar, so I basically took that idea but used the GF cookie dough as the base et voila!  OH SO GOOD!

Recipe:

  • Cookie Dough – use my basic sugar cookie recipe and replace the flour with Cup4Cup flour or use my GF sugar cookie recipe:
  • Custard – blend together 1/2 cup softened butter, 2 cups confectioners sugar, 2 tbsp Birds Custard powder (yes it’s GF), 1/4 cup milk
  • Chocolate – 1 1/2 cup chopped chocolate and 1/4 cream.  Boil cream and melt chocolate to make ganache.  1/2 cup mini chocolate chips
  1. Preheat oven to 400F
  2. Bake off cookie dough in 8” square pan lined with parchment for 9mins.  Let cool.
  3. Layer custard on top of cookie dough crust.  Chill for 30 mins.
  4. Make ganache and cover chilled custard.  Sprinkle with mini chocolate chips.  Chill for an hour.
  5. Cut and serve
  6. Enjoy!

IMGP1381

Now you can totally make this with regular flour.  You could totally just eat the custard with a spoon, OH SO GOOD.  And mini chocolate chips always make treats fun!

Thanks for looking!

Thursday, June 28, 2012

Chocolate Brownie Fudge Bar with Chocolate Ganache

I have a confession…I love to host dinner parties.  So when Rob bought his birthday present, a new smoker, it was another great reason to have a few friends (or twenty) over to test it out!  I try to say we’ll do the main and everyone else bring sides potluck style but I just can’t stop myself.  You just never know, someone may forget, so I may over prepare.

This past weekend was no exception.  I had hummus with carrots and pistachio's for appys, watermelon skewers with a balsamic reduction and watermelon stars on sticks for the kids as a fresh side and of course we did four racks of ribs and a 10lb pork shoulder as the main. (sorry no pics)

Now you’re probably thinking, ok let’s hear about this fudge bar you teased us with in the post title.  ok ok!

I also believe that every good meal should have an equally good dessert and so do our guests.  When they saw the watermelon they immediately asked where the fattening alternative was.  They know me so well.

So I made this…

IMGP0104

It’s a brownie layer covered by a fudge layer and then covered in a chocolate ganache coating.  Can I get a yes please??????  oh me please.  After I cut out the pieces for the pictures, I of course had to give it a taste test.  WELL…

I immediately texted Rob and told him he’d been replaced :)  LOL

IMGP0105

Brownie recipe can be found here

Fudge recipe can be found here

Ganache recipe can be found here

Put it all together and enjoy!

Thanks for looking!

Thursday, March 22, 2012

Something I never thought I’d do…use a box mix

I know I know, what has become of me???

Well, so many great bakers use them and they’ve gotten much better since the last time I used one.  I mean I grew up in a scratch kitchen.  Which means my mum and grandmum always made from scratch.  So personally I love scratch cake.  I’ve also spoiled/ruined my kids and they prefer scratch too. 

IMGP9022

Now you are asking how and why did I have one in my house?  Well, I bought them when I was making my birthday cake.  I thought I’d just make an easy cake and practice the ruffles, which was the purpose of making the cake.  But when it came time to do it, I couldn’t.  So the mixes have been in the house since January. 

We had friends this weekend and I used one box for the kids as dessert.  I replaced the oil with pumpkin puree and then baked them in this awesome Snow White and The Seven Dwarfs mini cake ban.  The kids loved the little cakes.  Aren’t they awesome?

IMGP9009

With one box down, I had one more to use up.  I thought… lets try something and if it doesn’t work, then no worries.  I had left over cherry juice and pumpkin puree still in the fridge.  I replaced the water with juice and the oil with pumpkin puree and to be honest, it’s delish.  I still prefer a more dense cake but for what I did to it, it’s pretty rich.

I bought a mini flower silicon cake sheet, but they stuck. So into a ziploc bag and off to the teachers at Rowan’s school.  Then with the remaining batter I made a 4” inch round and then made some lower fat ganache.  I didn’t have heavy cream, so I just used milk and it worked just great.  I sliced the cake into three and in between each layer was a scoop of ganache and then sprinkled with Heath Toffee pieces.  On top more ganache and more toffee pieces.

slice

OMG, it’s decadent.  Never thought I’d say that.

Recipe: Chocolate Cherry Cake

  • Duncan Hines Devils Food Cake mix
  • 3 eggs
  • 1 1/2 cups tart cherry juice
  • 1/2 cup pumpkin puree
  1. Mix ingredients together and bake as directed.

Ganache:

  • 2 cups chocolate chips
  • 1/2 cup milk
  1. Bring milk to a boil and pour over chips.  Stir until smooth.  Let cool a bit.

Assembly:

  1. Slice cake into thirds.
  2. In between each slice, cover with ganache, sprinkle with toffee chips and add more ganache.
  3. On top layer, cover with ganache and let flow over sides.
  4. Sprinkle with toffee chips.
  5. Slice and enjoy!

I also did the nutritional data for this.  Full recipe is for 12 servings. 

(Per serving: Calories: 347; Carbs: 49g; Fat: 17g; Protein: 4g), so eat cautiously!

IMGP9024

Where I may not use box cake mix for cakes in future, unless it’s requested, I’ll admit they aren’t as bad as remembered.  So if you’ve got one lying around and don’t know what to do with it, try this!

Thanks for looking!


Linking with:
Full Plate Thursday
It's a Keeper Thursday
Sweet Treat Thursday
TGIF at Craft Junkie
I'm Lovin It Friday
Sweet Tooth Friday
Gallery of Favourites
Mom Trends
Anything Goes Linky